

")

While a cloth simulation needs to be stored as a mesh-based animation, that would be overkill for the underlying character model. For the mannequin, a skeleton based approach is saving lots of space and thus bandwidth. To get this kind of animation into Blender, use the FBX format to export the avatar from Clo 3D.
When imported into Blender, the character should show up with an armature, but the animation might not neccessarily match. In case there are issues, go to the animation workspace to investigate. Make sure you have the armature selected and that the editor space at the bottom of the workspace, the Dope Sheet area, is set to Acion Editor.
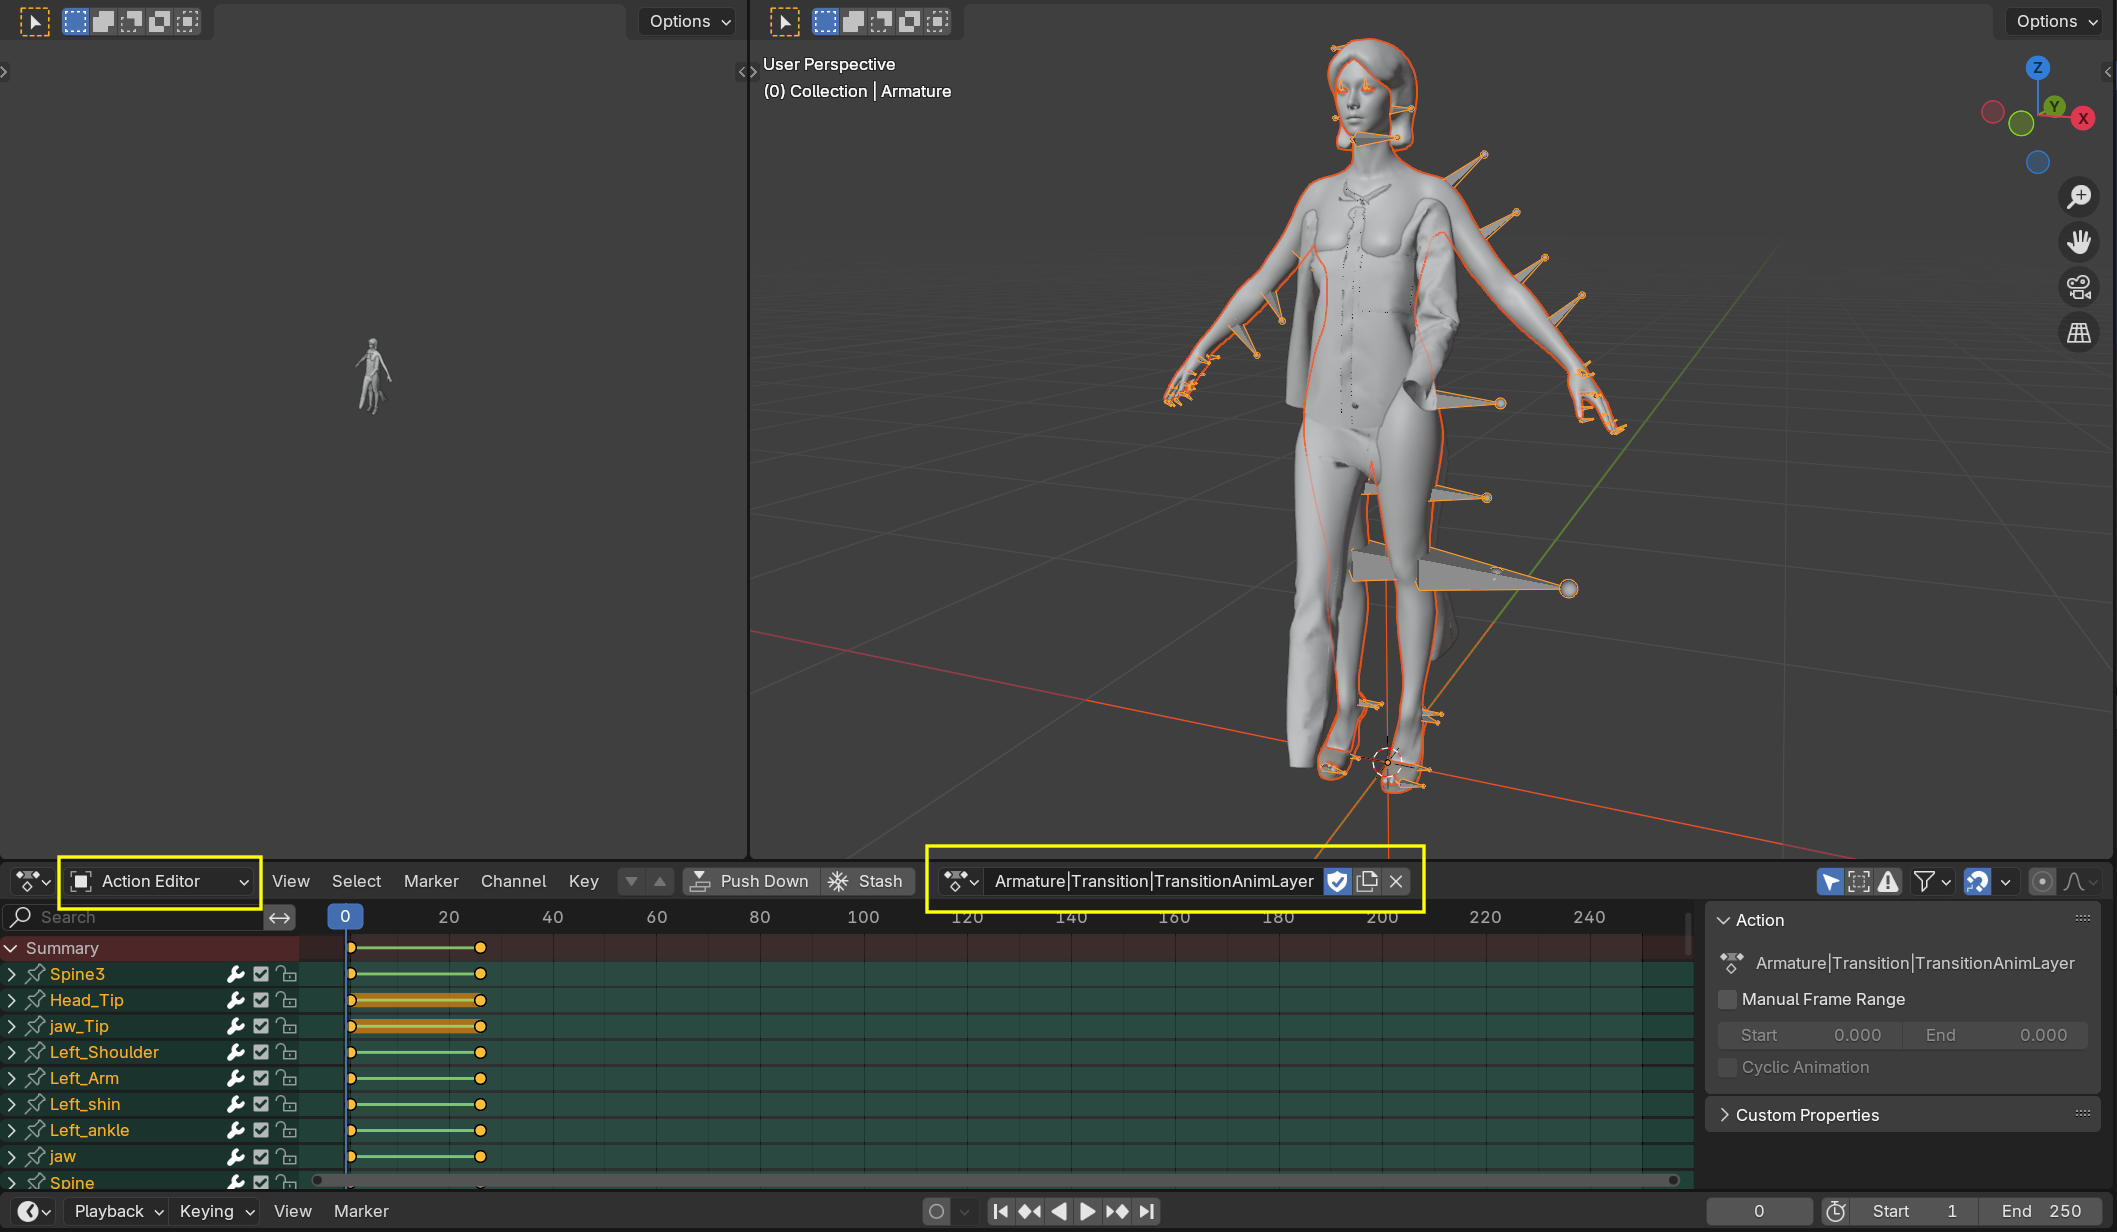
Depending on how many animation strips you have used in Cro 3D, there can be multiple actions available now. Most likely there is a main action and a kind of intro action that works as a transition from A-pose to the first frame of the main action. In the middle of the header of the Action Editor there is a drop down to select the current action. Select the one that corresponds to the movement of the imported cloth.
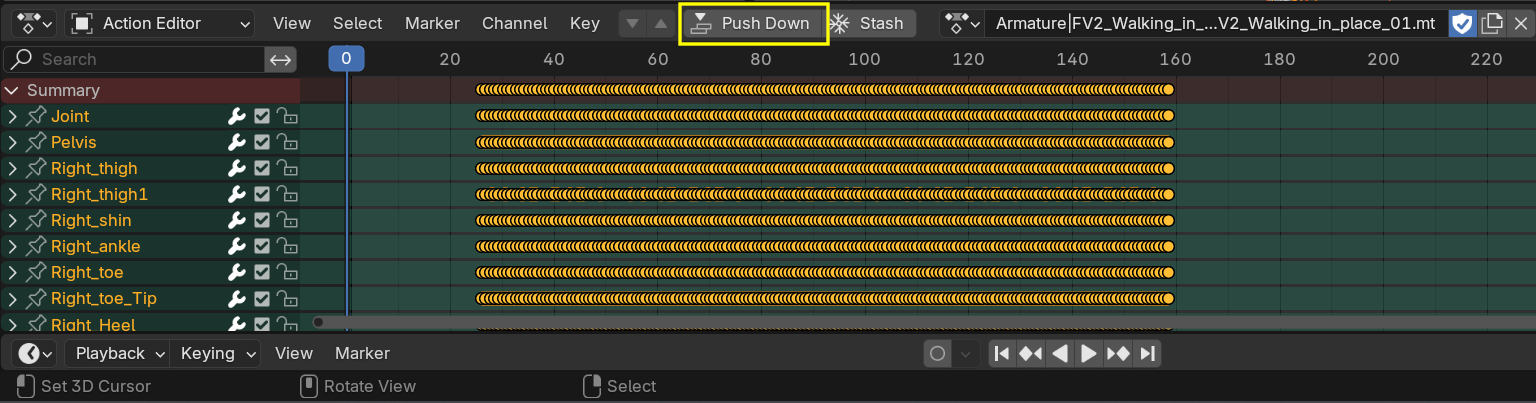
The animation might not start on the correct frame and might even play at the wrong speed. This is something we are going to fix in the Nonlinear Animation Editor or in short NLA. As a preparation, click on the botton that reads Push Down in the header of the Action Editor.
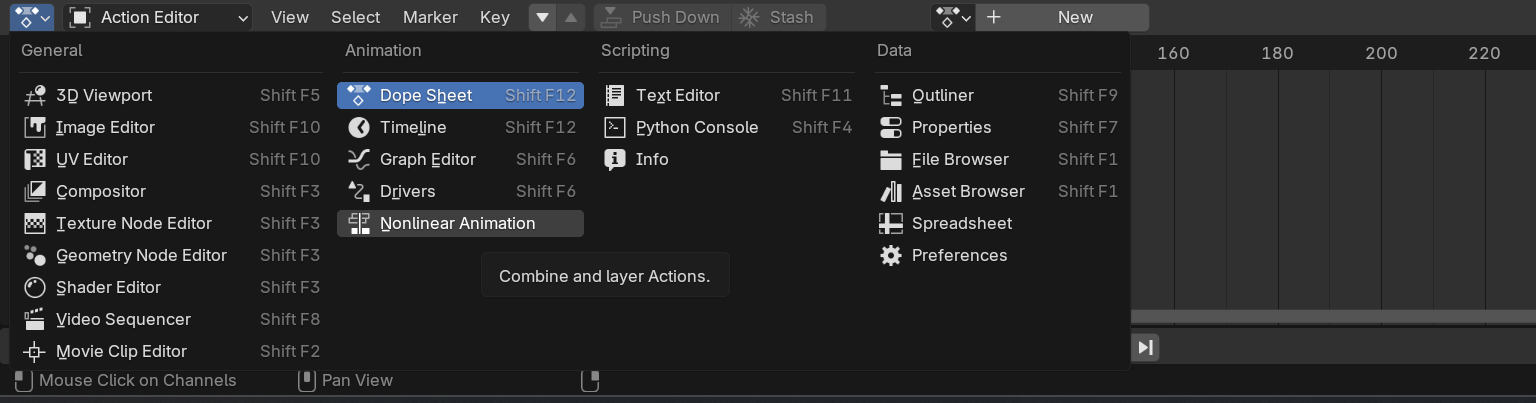
Next change the area type from Dope Sheet to Nonlinear Animation.
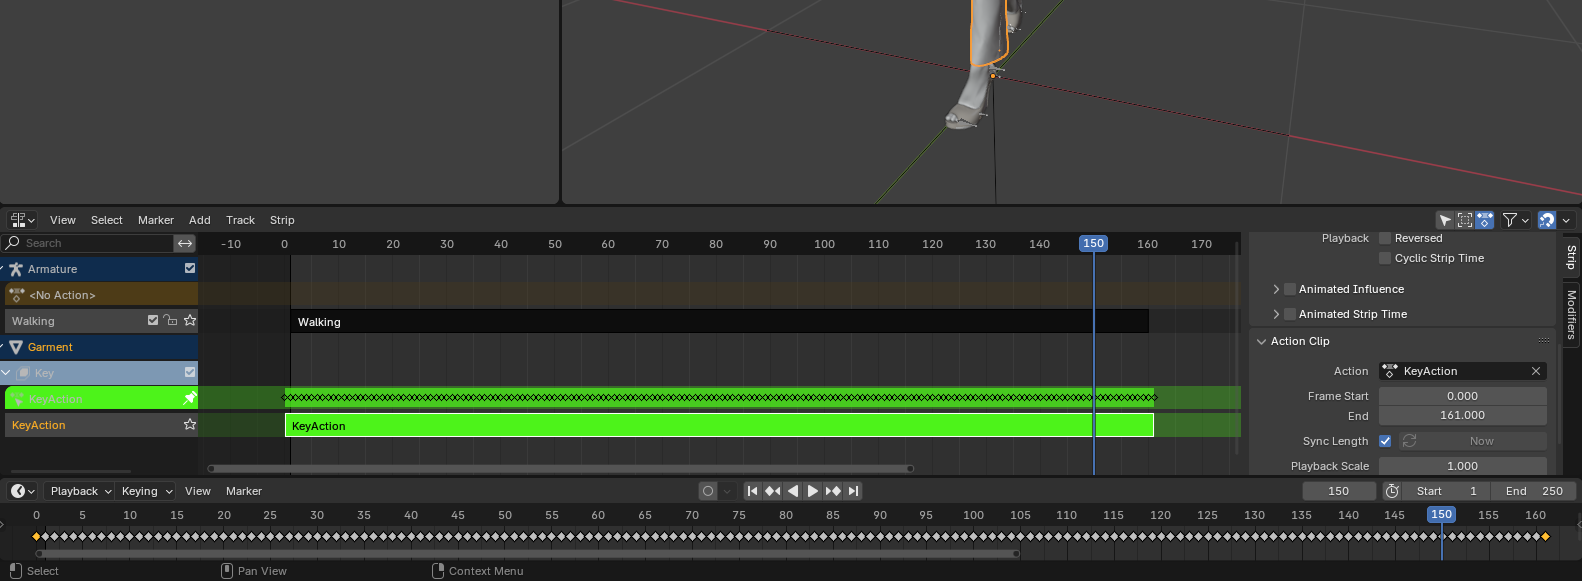
In the NLA you should see at least one animation strip by now. The animation of the cloth should also be there. On the left there is a tree-like view of the available actions where you can make the other actions show up as strips by clicking on the small arrow at the very left of each layer. In our example there are two animations, one on the avatar and one on the cloth. So there are two strips. You can move the strips around by clicking and dragging.
Sometimes the speed of the animations does not match up. A common mistake is that the animations have been exported at different frame rates, for example one with 25 frames per second (FPS) and the other one with 30 FPS. In our example this is the case. We can sync the animations up again by changing the speed of one of them and that should be the armature based animation of the avatar because the mesh based animation of the cloth consists of one shape key per frame turned on for exactly one frame while the animation on the bones of the avatar can interpolate a lot better.
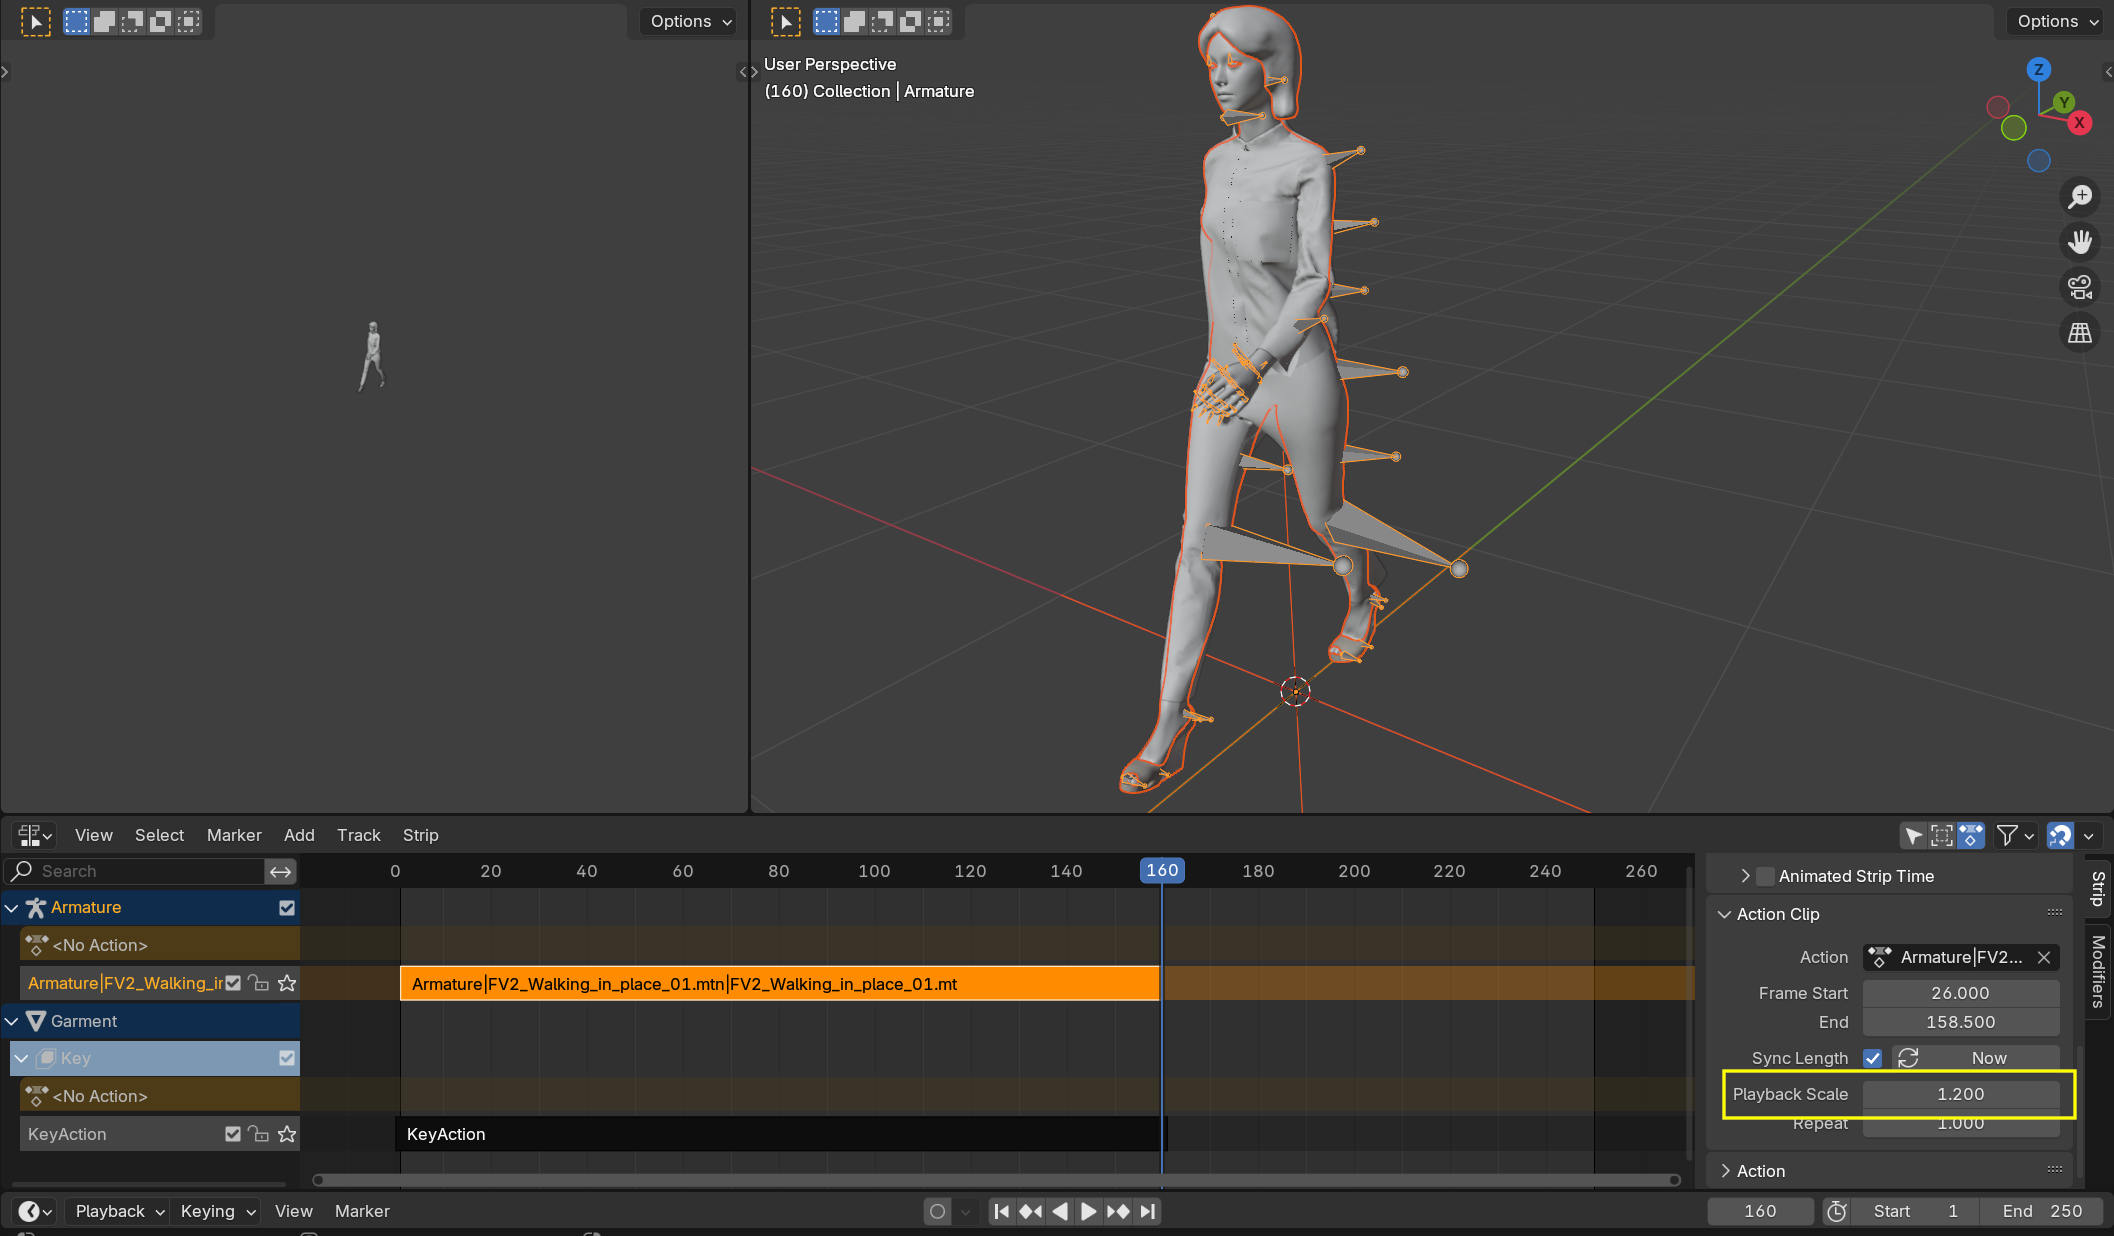
One way to match the animation speed is to use the shortcut key S to scale the strips but there is the precise alternative of changing the Playback Scale of a strip. You can find that property in the sidebar to the right, which you can open using the shortcut key N in case it is closed, in the sub-panel Action Clip. As usual in Blender, you can use the input field as a calculator. In our case typing 30/25 did the trick of prolonging the clip to match the 25fps animation of the cloth. Beware that under the hood there might still be inconsistencies. You can make sure all the keyframes of the animation are locked to Blenders frames in the timeline and thus perfectly in sync with other animations by applying the scale. The shortcut CTRL+R or Strip - Apply Scale should do the trick. This will create a new action, though. That's why we recommend to give every action a recognisable name. The newly created one will have a .001 as suffix to it's name. The new should already have taken the place of the old one in the NLA strip so you should not need to do anything, just beware that there is a lonely action floating around in your Blender file now.
It appears that sometimes, the cloth animation has the first and last frame duplicated, which results in an animation that is out of sync. Play the animation frame-by-frame using the left and right arrow keys on your keyboard to test whether this is the case. When the cloth animation strip is exactly two frames longer than the armature animation this is another indication that it has said frame duplicates at the beginning and end. For a simple way to delete them we need both the timeline and the NLA open at the same time. This is indeed the default for the animation workspace, but the timeline is at the very bottom and so slim it is reduced to it's header. It is the small strip with the playback controls. Make it a bit bigger by hovering with the mouse over the border between NLA and timeline and clicking and dragging upwards. Next select the cloth object and in the NLA select the according strip and hit the Tab key. Now you should see the keyframes of the strip's action in the timeline. Select the first and last and delete them with the shortcut X and hit the Tab key again to get back out of edit mode.
Congratulations, now you can export the character including the cloth to Hubs, but beware that when controlling the animation using components or behaviour graphs that you need to synchronize the two actions.