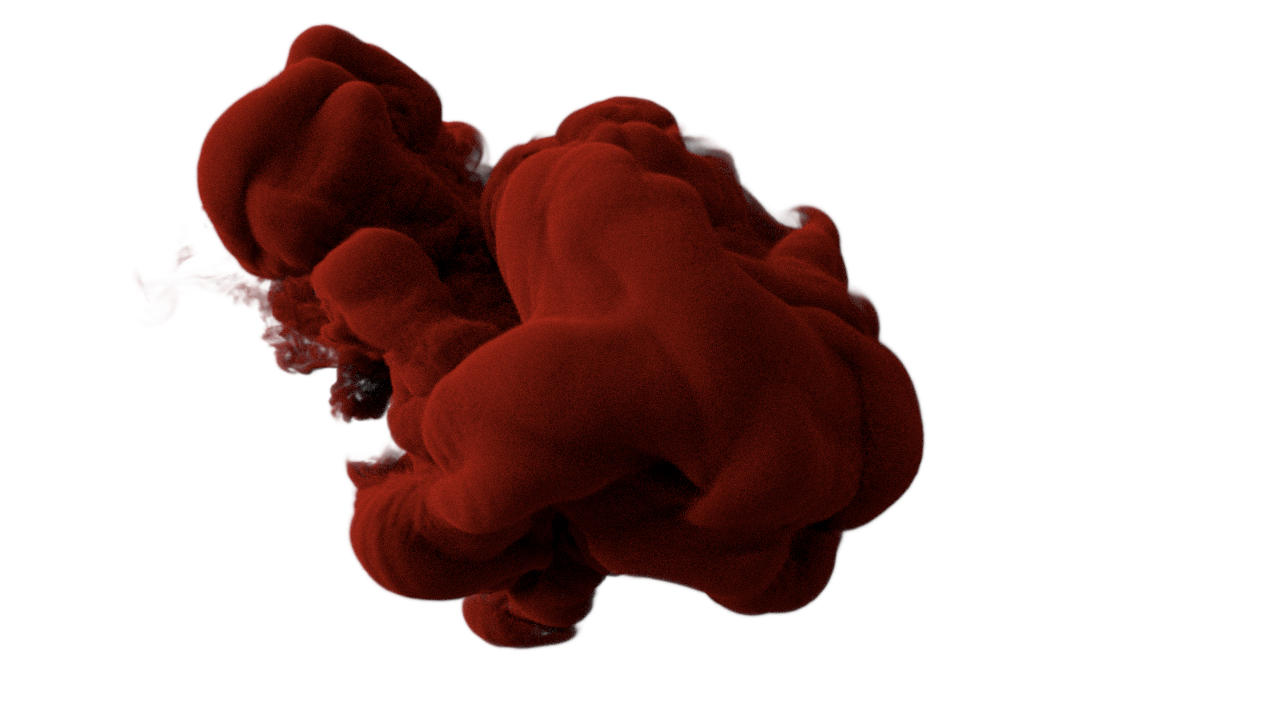
Ink drops in water are heavily used elements in graphic and motion design. You can create them right inside Blender. And thanks to the Cycles render engine you can create the traditional and more modern variants with ease.
Above you see the video version of the tutorial, below a text-based version:
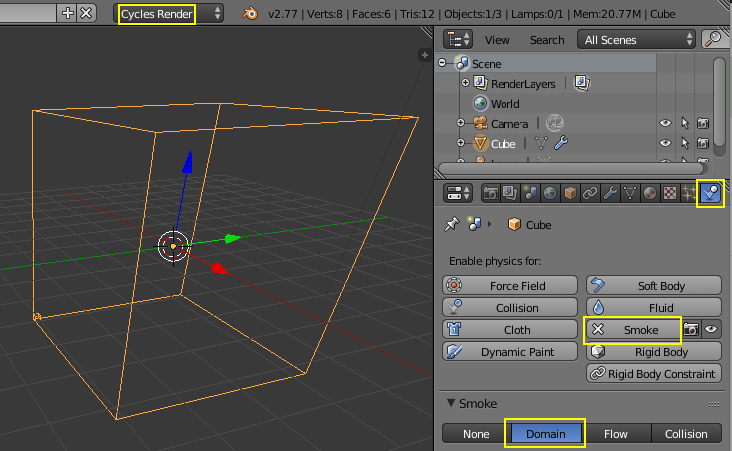
This tutorial uses Blender 2.77 or newer. Start by selecting Cycles as render engine in the info editor (the panel at the very top). Select the default cube and scale it up three times its current size by first hitting S and then 3. In the properties editor go to Physics, add a Smoke Simulation and select "Domain". The cube is now a container for the smoke simulation which we will use to create the ink drop. As a side effect, it is now drawing as wireframe in the viewport so we can add further elements without the cube being in the way.
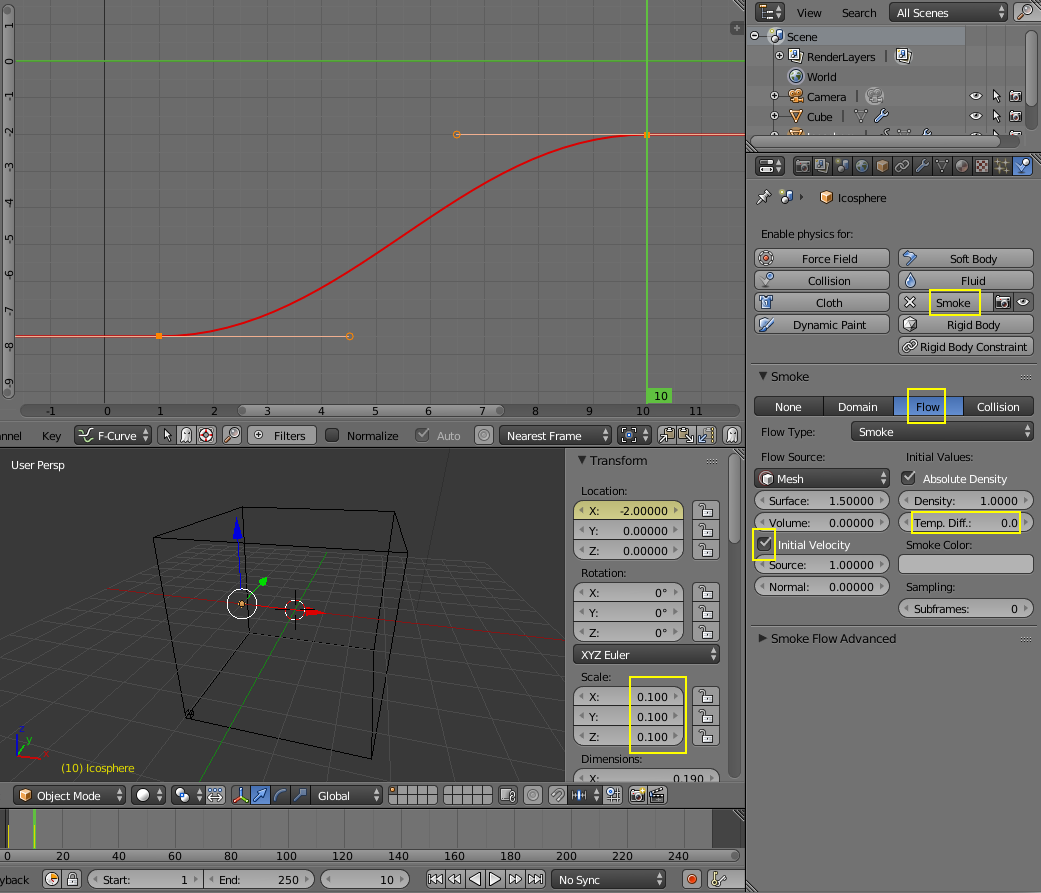
Add an icosphere (Shift + A - Mesh - Icosphere) and scale it down to 1/10th of its original size (S 0.1). The sphere will act as the source for the drop, so it needs to be animated as if it was falling into the water and slowing down. Its movement will later be used as the starting speed of the smoke simulation.
Make sure that you are at frame 1 in the timeline and move the sphere -7.5 units along the X-axis (G X -7.5). Insert a single keyframe for the X location by opening up the properties panel (N), right-clicking on the X location and selecting "Insert Single Keyframe". Next go to frame 10 and move it 5.5 units along the X-axis (G X 5.5). Insert another keyframe. When you play back the animation you will notice that the sphere starts slow, gets faster and then slower again. That is perfectly fine because when it enters the domain, it will be slowing down in a way that is similar to the way real drops of ink slow down when in water.
With the sphere selected head over to the physics settings in the properties editor and add a smoke simulation. Choose "Flow" and set the temperature to 0 so that the ink does not move upwards. Also turn on "Initial Velocity" to let the smoke inherit the movement of the sphere we have just animated.
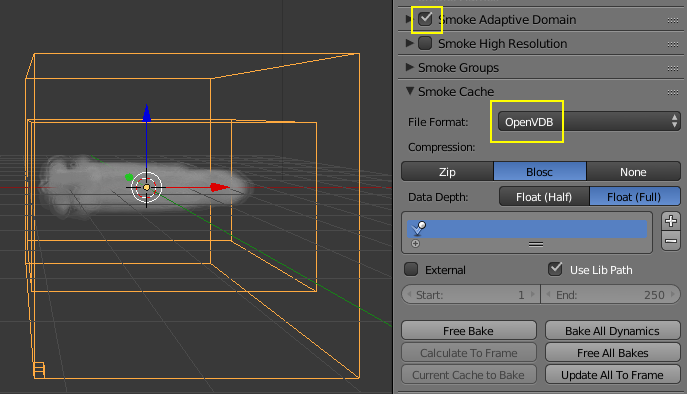
Now it is time for a first bake of the simulation. Select the domain, turn on "Adaptive Domain" to speed up the smoke simulation. Next open the "Smoke Cache" panel and select OpenVDB as file format. This is a new option in Blender 2.77 that will result in a lot smaller cache files. Then save your file and hit "Bake". When baking is finished, you can play back the animation and see the result of the smoke simulation in the viewport. It's currently just a plume of smoke moving accross the domain. The reason for that is that there is currently nothing there for the smoke to react to. We will fix this in the next step.
Add a Turbulence Force Field (Shift+A -> Force Field -> Turbulence). You can add it anywhere in the scene, the location of the force field does not matter. In the physics tab change the Strength to 10. This is necessary because smoke simulation in Blender needs quite some force in order to react to it. Set the size to 0.75. This is a value that I found good looking for this example. Set the Flow value to 1.0. This way the effect of the field will be fluid-like, which is exactly what we want here. Bake the smoke simulation again!
Now when you play back the animation you will see that the drop is dispersing in a turbulent manner. The basis of the effect is now done, the next steps will consist of tweaking to improve the result.

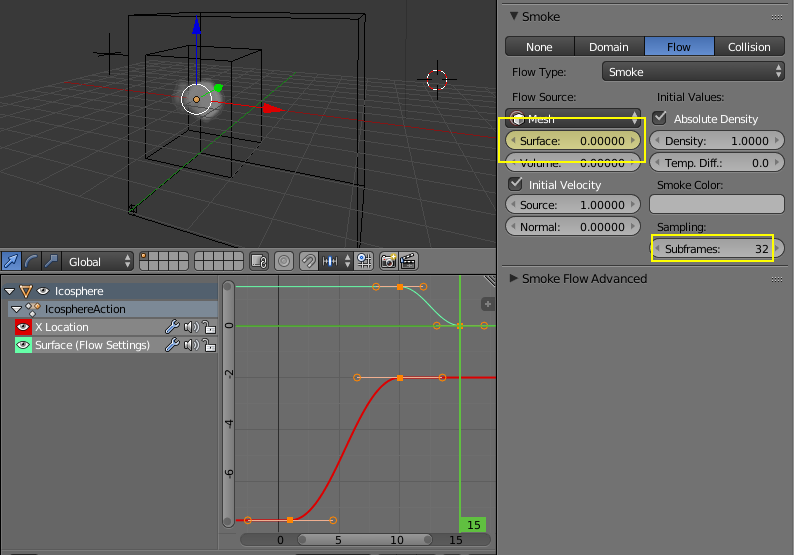
Currently the sphere keeps emitting ink even when it has slowed down so much that it stays in place. This can be fixed by animating the flow settings. Select the sphere and go to frame 10 (which is the frame where it is slowed down to a halt). In the flow settings insert a keyframe for "Flow Source: Surface" by hovering over the field and hitting I. Next go to frame 15, set the value to 0 and insert a keyframe again. Set the value for "Subframes" to 32. Now the emitter won't just emit smoke for every frame but also 32 times in between frames, resulting in a smooth stream during the short path it takes through the domain.
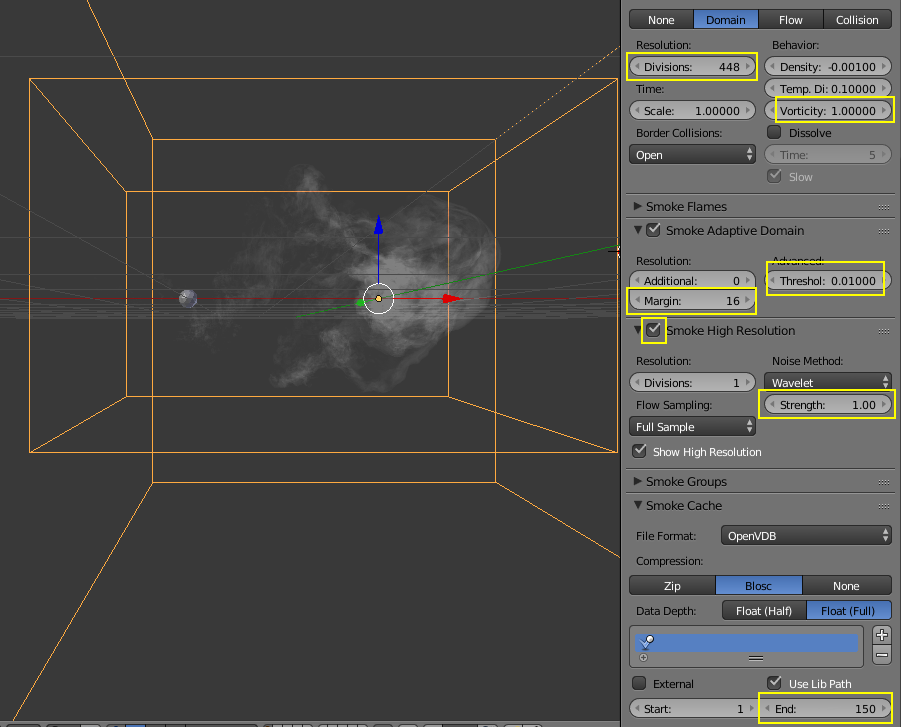
There are a few more settings for the domain that can be tweaked. Select it and reduce the Vorticity to 1.0. This setting controls the likeliness of the smoke spinning around. A higher setting means that there are more and smaller whirls while a lower setting will result in less but larger whirls. For ink in water less but more defined whirls are the way to go. A setting below one might yield even better results so experiment.
Check "Smoke High Resolution" and set the strength to 1.0. Keep the divisions at 1. Usually you want as much High Resolution as possible because you get lots of extra detail for little extra render time. In this case that extra detail would destroy the smooth look of the ink. That is also the reason why we reduced the strength to 1.0. We still turn on High Resolution because just turning it on will alter the look of the smoke simulation, connecting small blotches that might appear when the normal resolution is set really high.
The last thing to consider before baking is the setting for Resolution: Divisions of the Domain. Set it as high as possible but be careful because it takes a lot of RAM. For a machine with 16 GByte of RAM set it a little lower than the maximum of 512, for example to 448. If you have more than 16 GByte of RAM you can set it to 512. You should also increase the "Margin" in the "Smoke Adaptive Domain" tab to 16 because the default Margin of 4 is for smoke simulations with a small resolution like 32 or 64. Set the "Threshold" to 0.01 because the result will be very non-dense smoke so the threshold for no smoke at all should be as low as possible.
Now it is time to render the ink drop. For that we will add a simple shader to the domain on the next page.
- 1
- 2
