

")
By baking normal maps, you can add lots of details to models without increasing the polycount. Baked normal maps are used a lot in games, but are also useful for animations and still renderings. This tutorial shows you how to bake normals using the Blender Internal renderer.
This is part 1 of a two part series about baking normals. This section will cover the Blender Internal method, the second part will show you how to use Cycles Normal Baking. The results of both methods can be used in the same way as any other normal map, but the methods are very different, so you can pick your favorite.
- 00:00 What normals are
- 02:45 Preparing the Baking
- 03:30 Overview of the Settings
- 05:00 Preparing the Bake
- 06:20 Setup the scene
- 10:00 GLSL Material for Realtime Viewport Preview
- 11:00 Proper Setup
- 14:25 The Distance Settings
- 16:30 Bake from Multires
When I first started with Blender I read about normals everywhere, but all I knew about them was: If there are weird black spots on your object, go into edit mode and press CTRL + N to recalculate them. But then I stumbled across them in particle systems, texture inputs, normal maps and what-not.
So what are normals? Let’s get a little mathematical here. You cannot determine the angle a light ray hits a surface directly. Grab a pen and hold it so one end touches a piece of paper. As soon as you hold it at an angle, there is an infinite number of angles you could measure, all around the pen (fig. 1, left), so how do you decide which one to use? The answer lies in the normals of your piece of paper. If you raise the end of your pencil, so it is pointing exactly upwards, you will see that now there is only one angle to be measured: 90° all around, it is a right - or normal - angle. So a normal of a face is any line coming straight from it. It is possible to calculate the angle between two lines, so if a light ray hits a surface, its direction is compared to the normal of the face it hits, and the behavior is calculated from this angle. In short: Normals define how a surface is shaded.
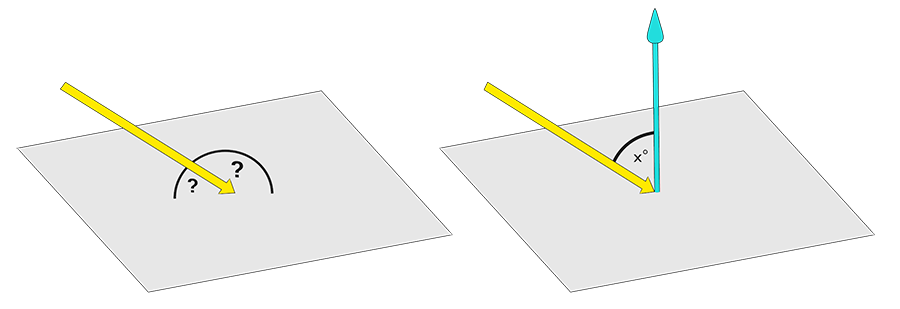
Fig. 1) How to calculate the angle in which a ray hits a surface.
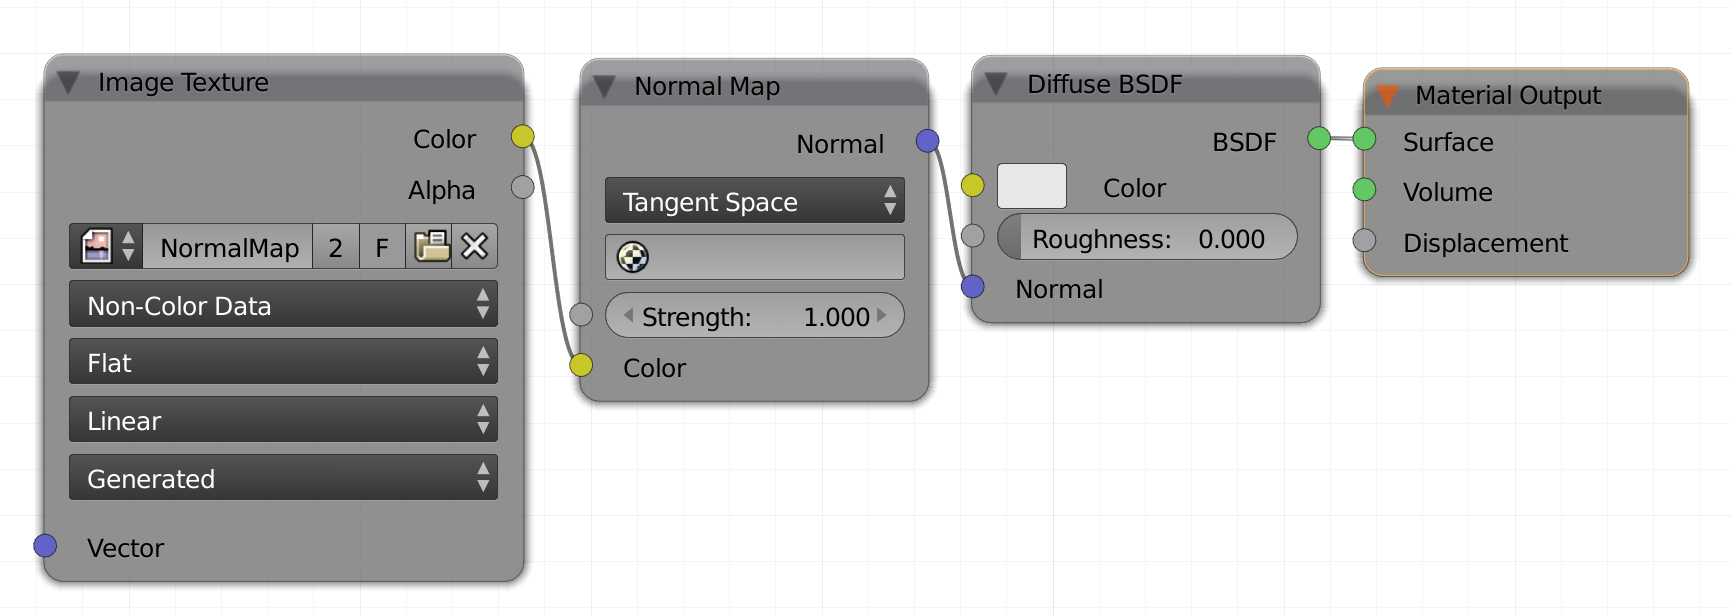
Fig. 2) The node setup for using normal maps in Cycles.
You can pretend to change the direction of the normals of any shading point by adding vector information through a color map. The proper way to do so in Cycles is to load the normal map into an image texture node, set this to non-color data. Also insert a Vector -> Normal Map node. Then connect the color out of the image to the color in of the normal map node. The outgoing normal vector needs to be plugged into the normal input of your shader node (see fig. 2).
The effect of normal maps can be very convincing when viewed from a steep angle while flat angles give the illusion away:

Fig. 3) Bottom: An example of a normal map that was baked in Blender Internal. It was created by placing simple plains under each surface of the stairs and baking the high resolution geometry as a normal map onto them. Top left: A scene with stairs where the bumps were modeled, it contains 270.000 polygons. Top right: The same scene using a normal map, only 930 face. For very flat angles, the missing geometry becomes evident.
The information about normals and normal maps above is an excerpt from the book The Cycles Encyclopedia, by Frederik Steinmetz and Gottfried Hofmann.