

")

Now it's time to edit the text. Select it and hit Tab to go into Edit Mode. Here you can edit the text just like in any text editor. When finished, hit Tab again to go back to Object Mode. For the BlenderDiplom logo I created two text objects and placed them left and right from the center. Of course the default font looks dull and you might want to change spacing, 3D extrusion and various other aspects, too. You can do so in the 'Object Data' of the text which you can find in the Properties Panel under the tab with the F-symbol.
Blender doesn't ship any more fonts but the default Blender fonts. If you want to change it, you need to have another font in Trutype-format (.ttf) located on your harddrive. A good resource for fonts with open licenses is the Google Web Font Archive. The following image shows the settings I used for the BlenderDiplom logo:
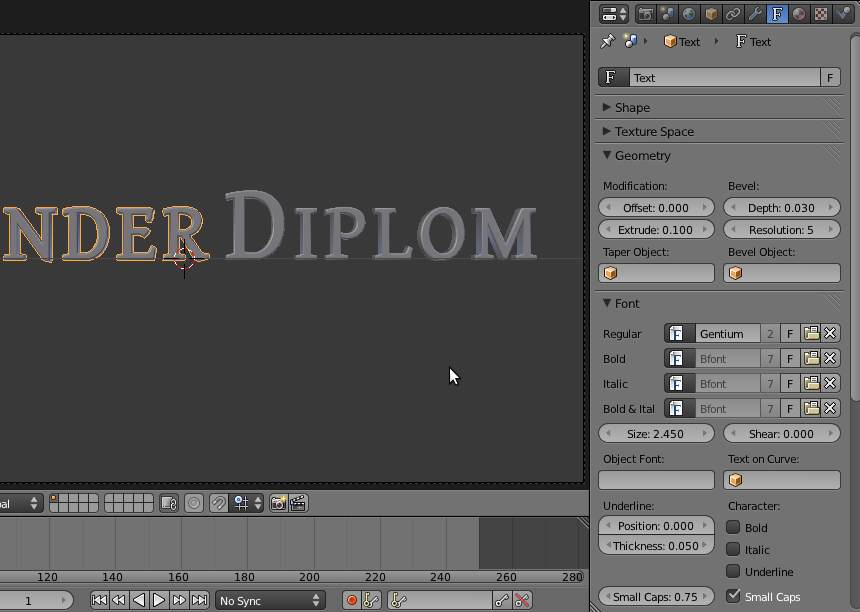
'Offset' controls the thickness of the fonts, 'Bevel' adds a chamfer but also increases the thickness, so you should first do the beveling and then change the offset if required. 'Resolution' sets how round and smooth the beveling is and 'Extrude' adds the third dimension to the text. Beware that 'Small Caps' at the moment only works when your are in edit mode and about to type your text. You cannot change it afterwards.
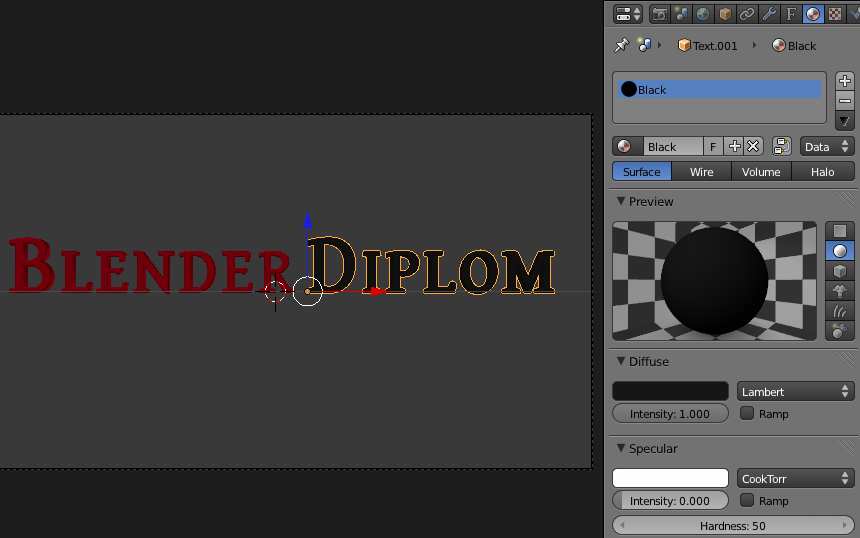
Next add some simple material to the text. Set the Diffuse Intensity to 1 and the Specular Intensity to 0. For the red of the BlenderDiplom logo I used a value of '9C000D' (Hex) and for the dark grey '161616':
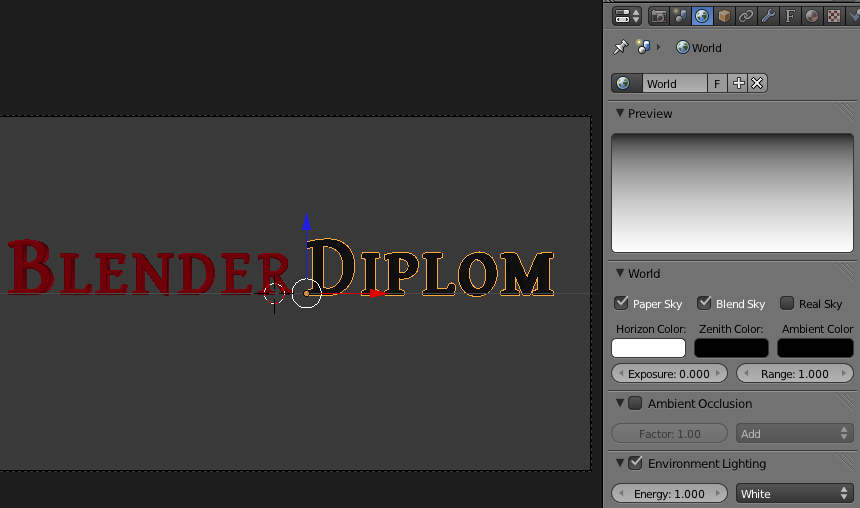
Head over to the world settings and turn on 'Evironment Light' at the default settings. That will add light that's coming from virtually everywhere to the scene. Turn on both 'Paper Sky' and 'Blend Sky' and make the Horizon Color pure white and the Zenith Color pure black.
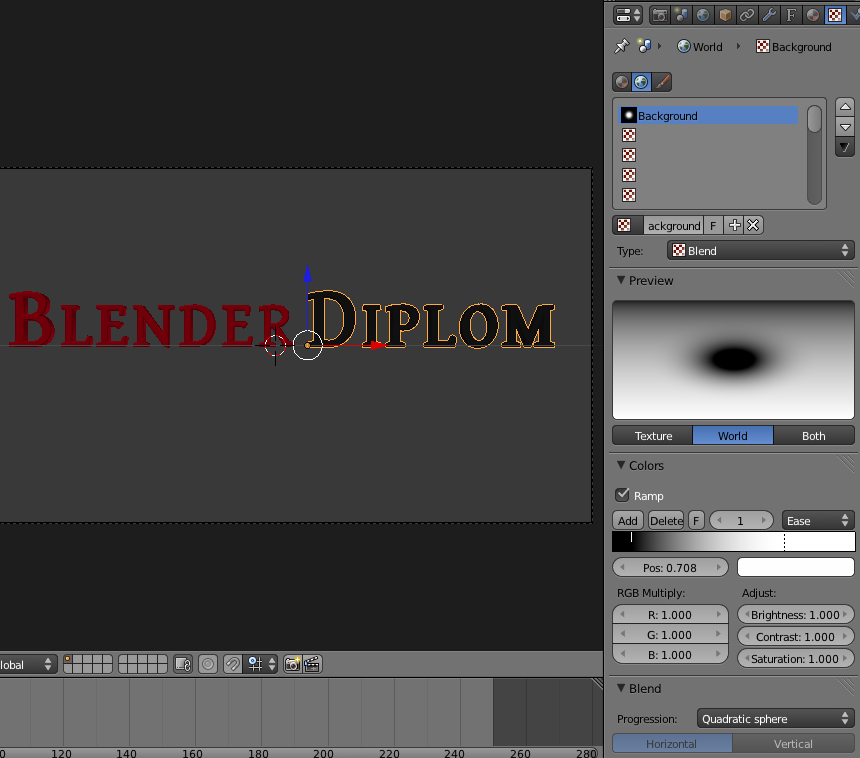
Now you can start to do the first test renderings. The linear gradient in the background looks a bit dull. Go to the textures panel and add a new world texture. The small globe-symbol should already be selected. Choose 'Blend' for the texture type and 'Quadratic Sphere' for the progression. In the Color-section check 'Ramp' and change the color stops like in the following screenshot. Set the interpolation to 'Ease'. Select 'World' as the preview to find out how the texture will effect the background of the scene.
Deselect 'Blend' and select 'Horizon' under Influence. Voila, it's not longer a black dot but a grey one. By selecting either 'Zenith Up' or 'Zenith Down' the center becomes white just like the color stops. Of course the dot is way too small. To make it considerably bigger go to 'Mapping' and set X to 0.2 and Y to 0.3. In Blender, the size of textures is set in the way "how many times does the texture fit into the space". So by setting 0.2 for the X-axis the dot for the background became 5 times broader. Same for the Y-axis.

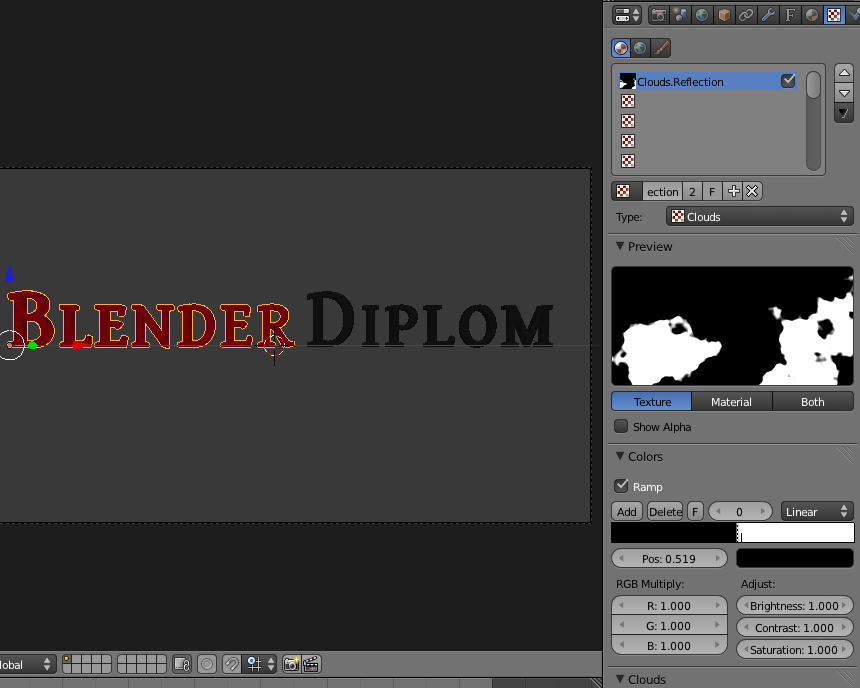
The reflection on the logo that adds the metallic look is created by a simple Blender clouds texture. Select one of the text objects and add a clouds texture. Change the size to 1.35 and the depth to 4. Choose 'Ramp' again for the colors and place the stops very close to each other at the center. The left stop placed at 0.519 and the right one at 0.530 will give a nice result. This way the clouds get a look that reminds of a map or blotches of a cow.
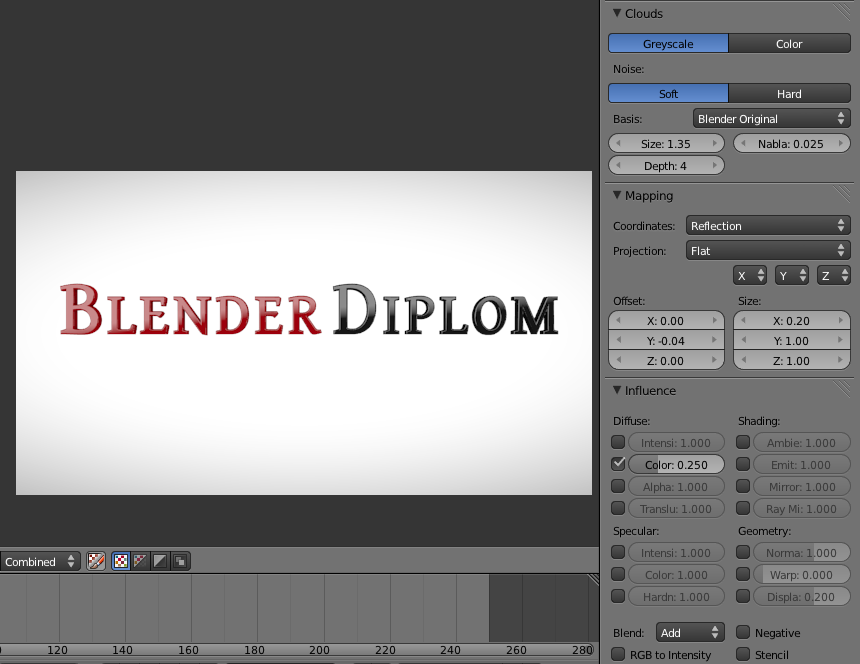
The trick to get the metallic look is to set the coordinates under 'Mapping' to 'Reflection' and the X-size to 0.2. Under 'Influence' set 'Color' to 0.250 so that the effect isn't too strong and the Blend-type to 'Add' (reflections are always added to materials). Note that when you use two objects with two materials like I did, you can re-use the texture on the other objects but have to set mapping and influence again. There should be some reflection-band visible already. By changing the offset you can place it where you want (I used -0.003 for Y on the black part and -0.004 on the red).
So far the look of the logo has been set up. Now for the fun part - dissolving it to dust! Find out about that on the next page!
- 1
- 2